
Hours
| Sunday | 12:00 PM – 5:00 PM |
| Monday | 10:00 AM – 6:00 PM |
| Tuesday | 10:00 AM – 6:00 PM |
| Wednesday | 10:00 AM – 6:00 PM |
| Thursday | 10:00 AM – 6:00 PM |
| Friday | 10:00 AM – 6:00 PM |
| Saturday | 12:00 PM – 5:00 PM |
Closed on statutory holidays.

Richmond BC, Canada #richmondartgallerybc
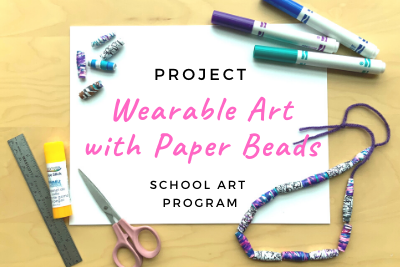
In this second video art lesson, students will be introduced to the artwork of Canadian artist Karin Jones, currently on display at the Richmond Art Gallery. Gallery educator Melanie Devoy then demonstrates the technique of making wearable artwork through the technique of making paper beads. To see more of Karin’s work, check out the Labour’s trace exhibition.
Materials:
Procedure:
If you want to share your art online, post with #RAGatHome or #RichmondConnects.
To learn more, check out these related links:
Labour’s trace exhibition page
Video Interview with artist Karin Jones.
Labour’s Trace Teacher Guide
Black History in Canada: https://www.thecanadianencyclopedia.ca/en/studyguide/black-history-in-canada-education-guide
Recommended books: https://socialjusticebooks.org/booklists/slavery/


